Difference between revisions of "How to Scale an STL File and Print the File on 3D Printer"
| Line 26: | Line 26: | ||
[[File:TurnOnSupportFeatureOnMakerBot.PNG]] | [[File:TurnOnSupportFeatureOnMakerBot.PNG]] | ||
| + | ---- | ||
| + | Now, connect your computer to the 3D printer or insert SD card to your computer if you choose printing your model by inserting SD card to the 3D printer in the SD card slot. Then click on ''File'' and choose ''Export'' to change the file format in a way the MakeBot Printer reads it. | ||
| + | [[File:ExportTheModelToPrintMakerBot.PNG]] | ||
Revision as of 11:05, 3 November 2014
First, if you haven't downloaded the MakerBot Desktop program, please go to the link below to download the file.
Download MakerBot Desktop Here MakerBot will allow you to scale or manage your 3D prints.
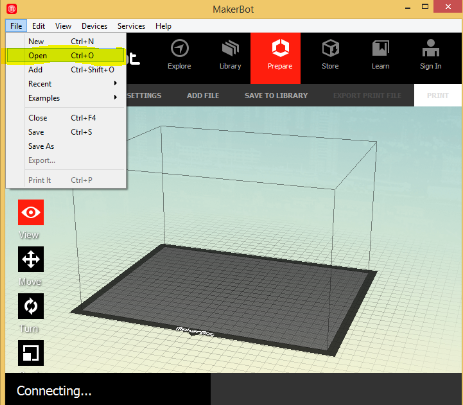
Once you download the MakerBot, open it. And then, click on File, select 'Open File' and add the STL file
Once you add the STL file, select the object by clicking on it. Then, on the left corner click on the scaling button:
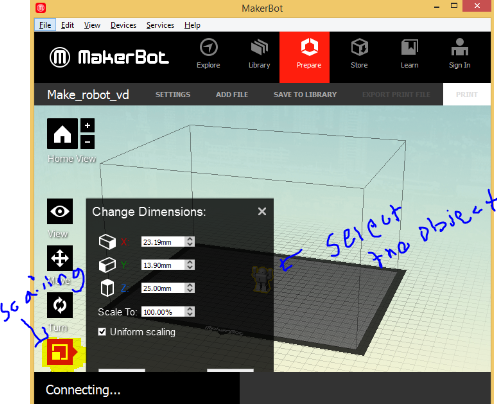
Few things to know about scaling: mark uniform selecting so you can scale all sides just by changing one of the sides. If you unchecked this option,your model will not be proportional when you scale it.
Once you finished scaling one object, the MakeBot allows you to add another file and print multiple objects at the same time.
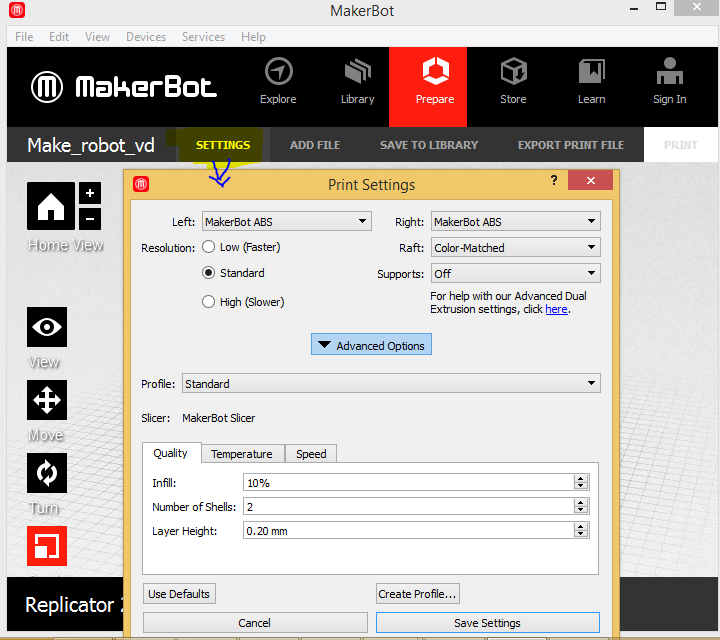
Now click on Setting button to edit the printer setting, which includes changing the temperature, deciding if your item needs a support or not, choosing ABS color, and soon. MakerBot automatically setup the default printer setting once you choose the printer type or the printer that you are using but still you have to choose color types and support options.
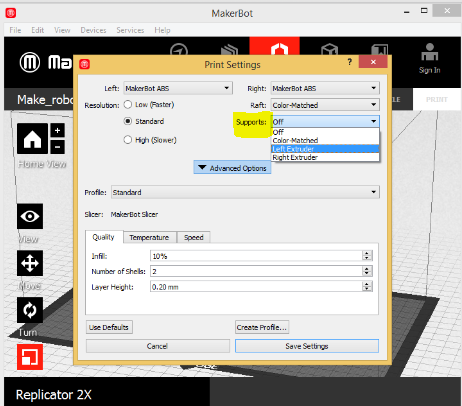
Printing with support is required since plastic must be deposited on a layer where there is no or insufficient plastic on the previous layer. This includes when the object you're printing has steep overhanging surfaces, straight overhangs, or fully suspended islands. To turn on the Support Feature, go to "Setting" and on setting on the right you will see the Supports feature and turn it on.
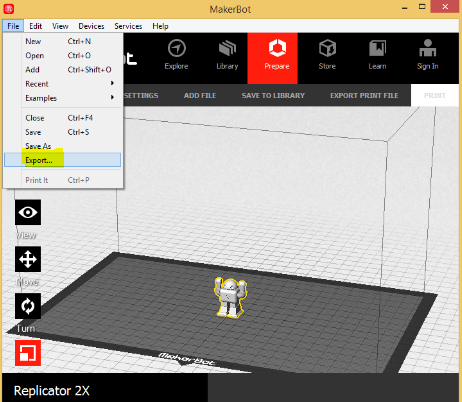
Now, connect your computer to the 3D printer or insert SD card to your computer if you choose printing your model by inserting SD card to the 3D printer in the SD card slot. Then click on File and choose Export to change the file format in a way the MakeBot Printer reads it.
