Difference between revisions of "How to Scale an STL File and Print the File on 3D Printer"
From Lofaro Lab Wiki
| Line 11: | Line 11: | ||
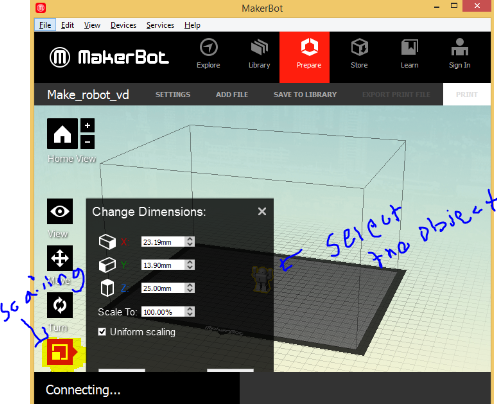
Once you add the STL file, select the object by clicking on it. Then, on the left corner click on the scaling button: | Once you add the STL file, select the object by clicking on it. Then, on the left corner click on the scaling button: | ||
[[File:ScalingOptionOnMakerBot.PNG]] | [[File:ScalingOptionOnMakerBot.PNG]] | ||
| − | Few things to know | + | --- |
| + | Few things to know about scaling: mark uniform selecting so you can scale all sides just by changing one of the sides. If you unchecked this option,your model will not be proportional when you scale it. | ||
---- | ---- | ||
Revision as of 18:08, 2 November 2014
First, if you haven't downloaded the MakerBot Desktop program, please go to the link below to download the file.
Download MakerBot Desktop Here MakerBot will allow you to scale or manage your 3D prints.
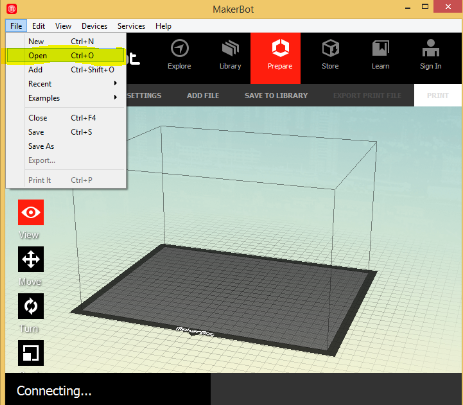
Once you download the MakerBot, open it. And then, click on File, select 'Open File' and add the STL file
Once you add the STL file, select the object by clicking on it. Then, on the left corner click on the scaling button:

