Samsung Gear
Before Starting
Goto the developers website:
Signup to become a developer (use a working email address)
Download Tizen Studio
Tutorials
This section shows tutorials based on the Samsung Gear developer's page: http://developer.samsung.com/gear/develop/
Build your own Native App
Welcome to Tizen wearable native application development!
A wearable native application is created using the C language, and can be run on Tizen wearable devices. The application uses the native API, which provides various interfaces to the device hardware allowing you to take advantage of numerous capabilities tailored to run with limited device resources.
Study the following instructions to help familiarize yourself with the Tizen native application development process as well as using the Tizen Studio and installing the created application on the emulator or target device. With the instructions, you can create and run a basic wearable native application, which displays some text on the screen with no user interaction:
- Before you get started with developing Tizen applications, download and install the Tizen Studio.
For more information about the installation process, see the installation guide.
- Create a wearable native project using the Tizen Studio.
This step shows how you can use a predesigned project template that creates all the basic files and folders required for your project.
- Build the application.
After you have implemented code for the features you want, this step shows how you can build the application to validate and compile the code.
- Run the application.
This step shows how you can run the application on the emulator or a real target device.
- Build a UI.
This step shows how you can make small alterations to the application UI to improve the usability of your application.
When you are developing a more complex application, you can take advantage of the native tools included in the Tizen Studio to ease the tasks of creating functionality and designing the application UI.
Creating a Project
The following example shows you how to create and configure a basic wearable native application project in the Tizen Studio. An application project contains all the files that make up an application.
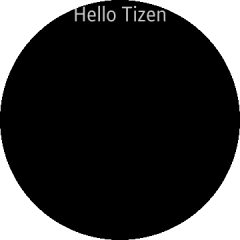
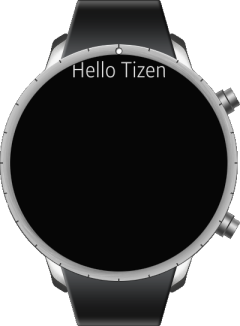
The following figure illustrates the application to be created. The application screen displays the Hello Tizen text and no user interaction is provided. If you click the Back key on the device, the application moves to the background.
Figure: Wearable native Basic UI application
To create the application project:
-
Launch the Tizen Studio.
-
Make sure the Native perspective is selected in the top right corner of the Tizen Studio window.
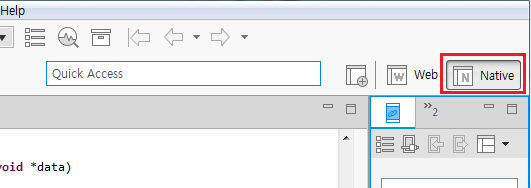
If not, select it. If the perspective is not visible, in the Tizen Studio menu, select Window > Perspective > Open Perspective > Other > Native, and click OK.
-
In the Tizen Studio menu, select File > New > Tizen Project.
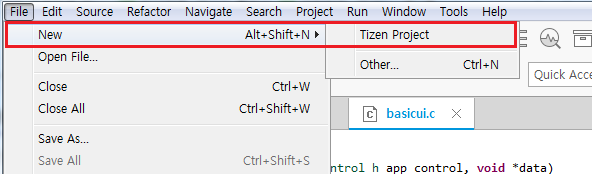
The Project Wizard opens.
-
In the Project Wizard, define the project details.
The Project Wizard is used to create the basic application skeleton with the required folder structure and mandatory files. You can easily create different applications by selecting an applicable template or sample for the Project Wizard to use.
-
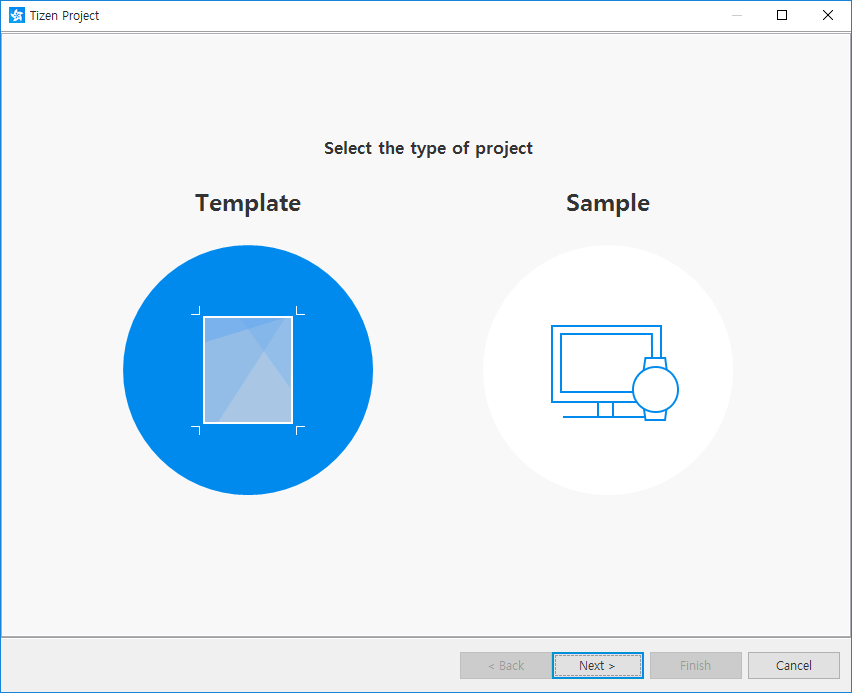
Select the Template project type and click Next.
-
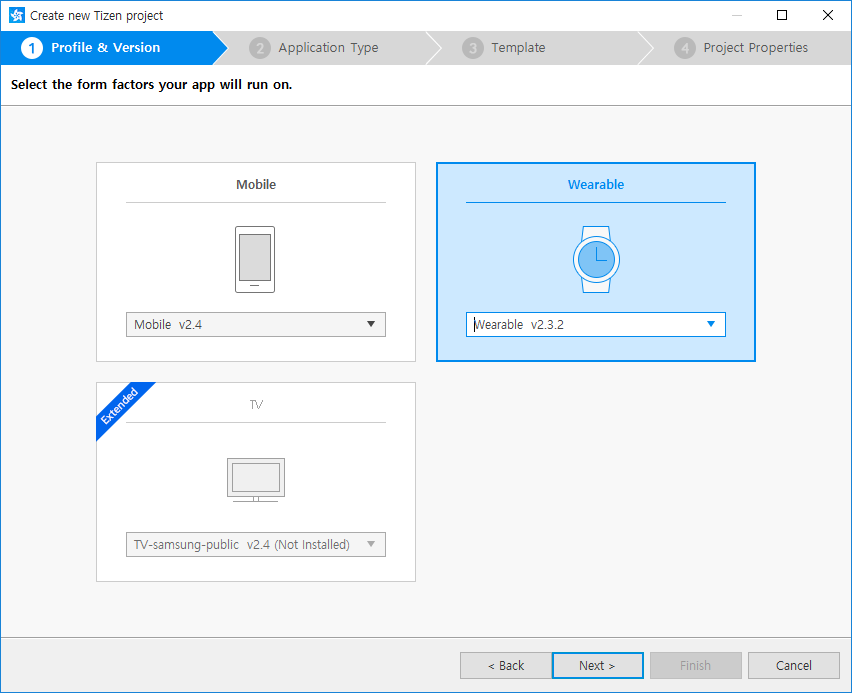
Select the profile (Wearable) and version from a drop-down list and click Next.
The version depends on the platform version you have installed and with which you are developing the application.
-
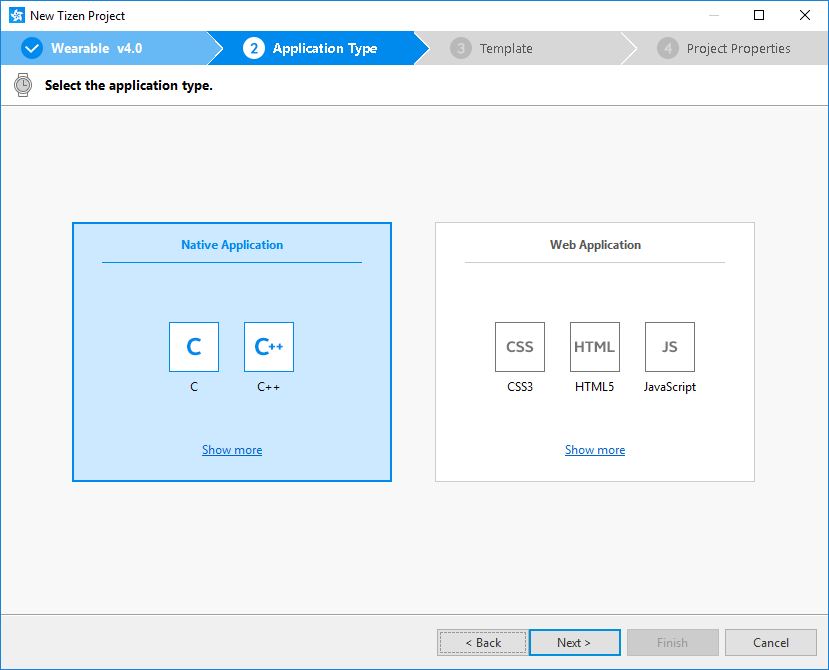
Select the Native Application application type and click Next.
-
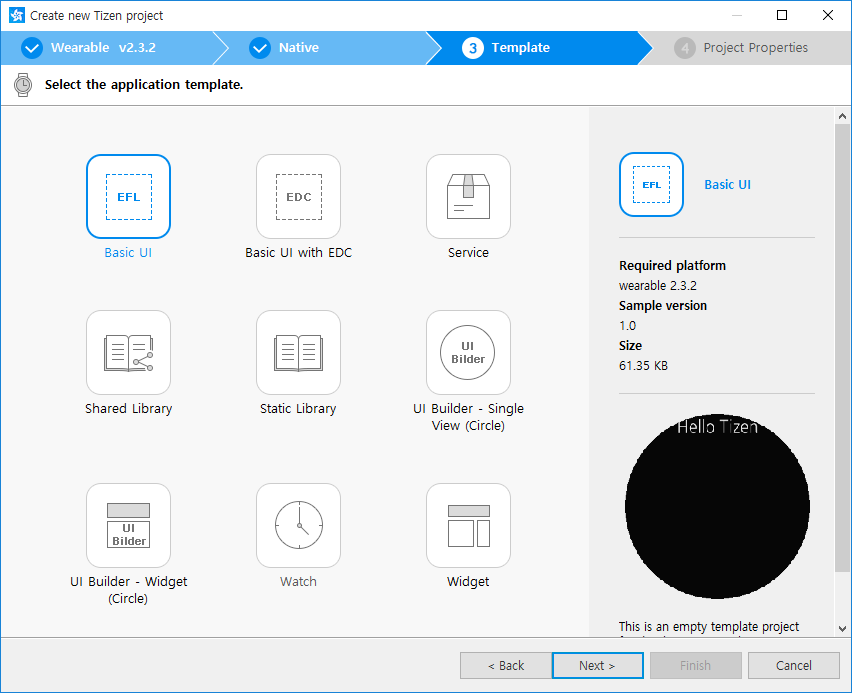
Select the Basic UI template and click Next.
-
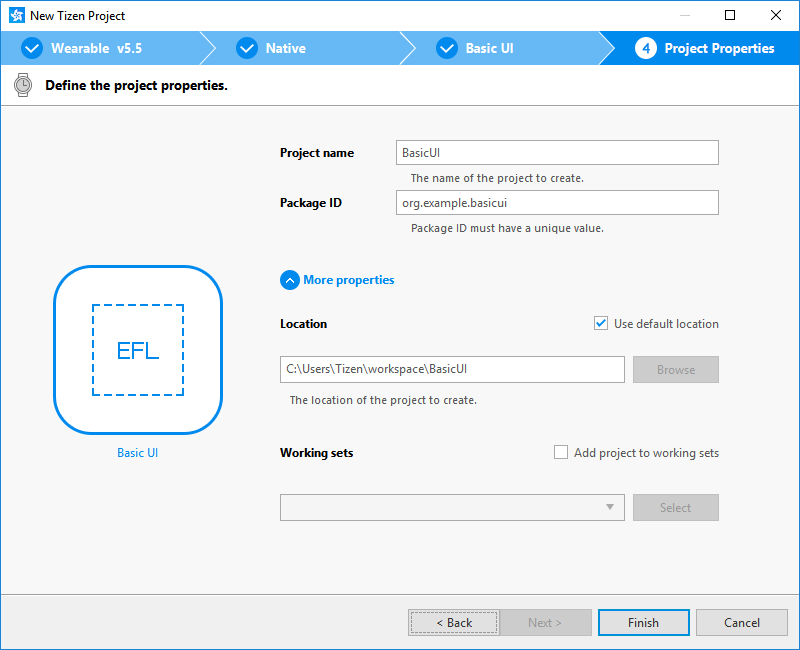
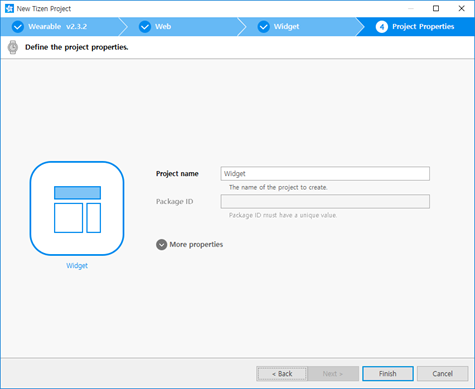
Define the project properties and click Finish.
You can fill the project name (3-50 characters) and the unique package ID. You can also select the location and working sets by clicking More properties.
The Project Wizard sets up the project, creates the application files using the default content from the template, and closes. For more information about the Project Wizard and the available templates, see Creating Tizen Projects with Tizen Project Wizard.
-
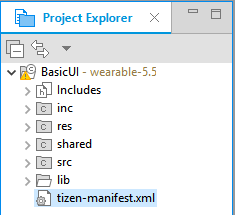
You can see the created project in the Project Explorer view. The most important files and folders include:
-
inc: Default folder for included source files -
res: Folder for resource files used by the application only -
shared: Folder for resource files to be shared with other applications -
src: Folder for source code files -
lib: Folder for external library files -
tizen-manifest.xml: Manifest file used by the platform to install and launch the application
Figure: Application in the Project Explorer
Your application project is now ready for further actions. Next, build the application.
Managing the Application Configuration
To view and modify the application configuration:
-
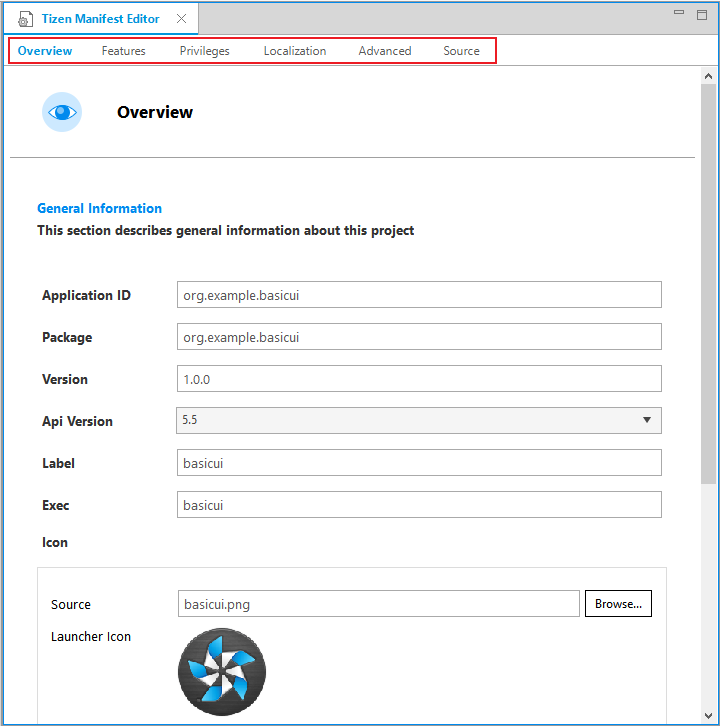
In the Project Explorer view, double-click the
tizen-manifest.xmlfile of the application. The Tizen Studio opens the file in the manifest editor. -
In the manifest editor, view and modify the configuration details using the various tabs:
-
Overview: Define general information, such as the package, label, and icon of the application.
-
Features: Define required software and hardware features. This information is used for application filtering in the Tizen market place.
-
Privileges: Define the security-sensitive APIs or API groups accessed and used by the application.
-
Localization: Define localized values for the application label, description, and icon.
-
Advanced: Define advanced features, such as application metadata, data control for services, application control functionalities, and account details.
-
Source: View and edit the source code of the
tizen-manifest.xmlfile. Changes made and saved on the other tabs are reflected in the source code and vice versa.NoteThetizen-manifest.xmlfile must conform to both the XML file format and the Tizen native application specification requirements. Editing the file in the Source tab is intended for advanced users only.
-
-
To save any changes, in the Tizen Studio menu, select File > Save All.
For more information about configuring the application, see Setting the Application Manifest.
Building Your Application
After you have created the application project, you can implement the required features. In this example, only the default features from the project template are used, and no code changes are required.
When your application code is ready, you must build the application. The building process performs a validation check and compiles your files.
You can build the application in the following ways:
-
Automatically
The automatic build means that the Tizen Studio automatically rebuilds the application whenever you change a source or resource file and save the application project.
To use the automatic build:
- Select the project in the Project Explorer view.
- In the Tizen Studio menu, select Project > Build Automatically.
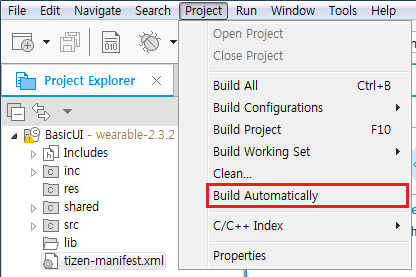
A check mark appears next to the menu option.
You can toggle the automatic build on and off by reselecting Project > Build Automatically.
-
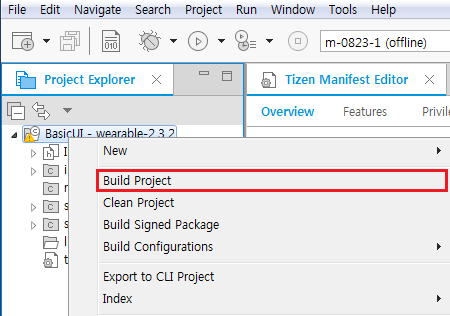
Manually
The manual build means that you determine yourself when the application is built.
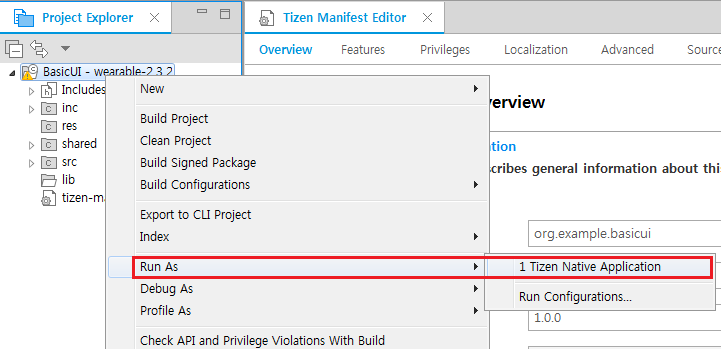
To manually build the application, right-click the project in the Project Explorer view and select Build Project.
Figure: Manually building the application
Alternatively, you can also select the project in the Project Explorer view and do one of the following:
- In the Tizen Studio menu, select Project > Build Project.
- Press the F10 key.
You can have more than one build configuration. To see the current active configuration or change it, right-click the project in the Project Explorer view and select Build Configurations > Set Active. The default configuration is Debug. For more information, see Building Applications.
After you have built the application, run it.
Running Your Application
You can run the application on the emulator or a real target device.
Running on the Emulator
To run the application on the emulator:
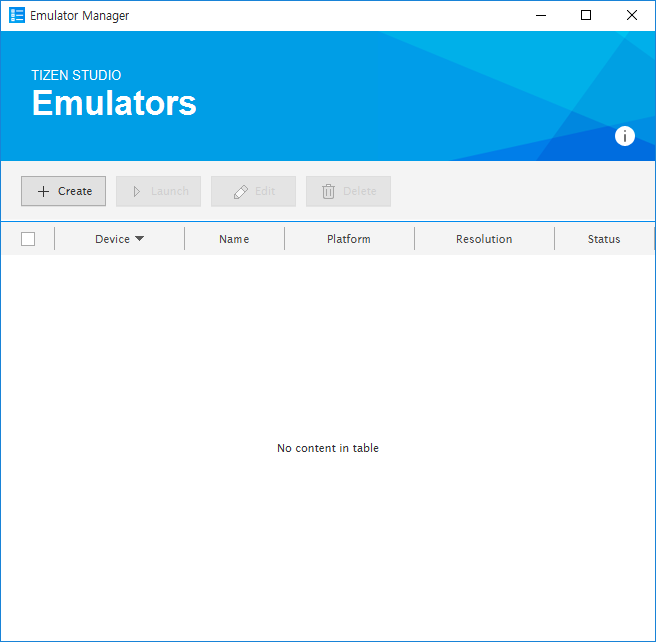
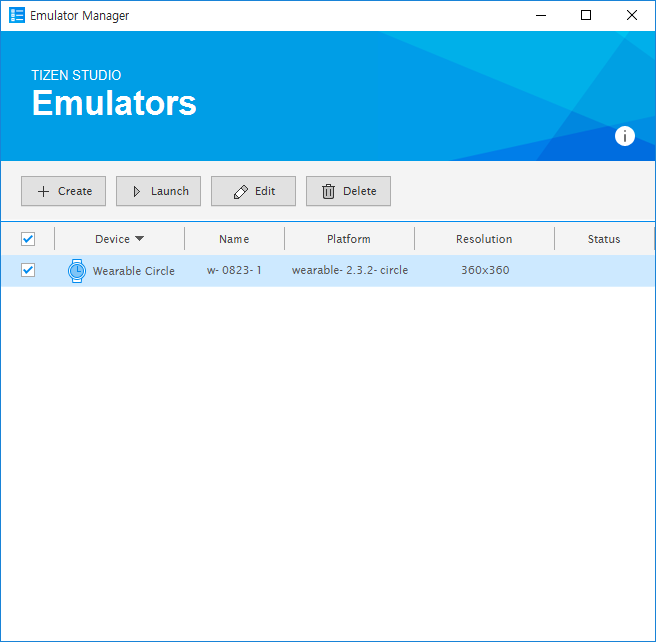
- Create and launch an emulator instance in the Emulator Manager:
- In the Connection Explorer view, launch the Emulator Manager by clicking the related icon.

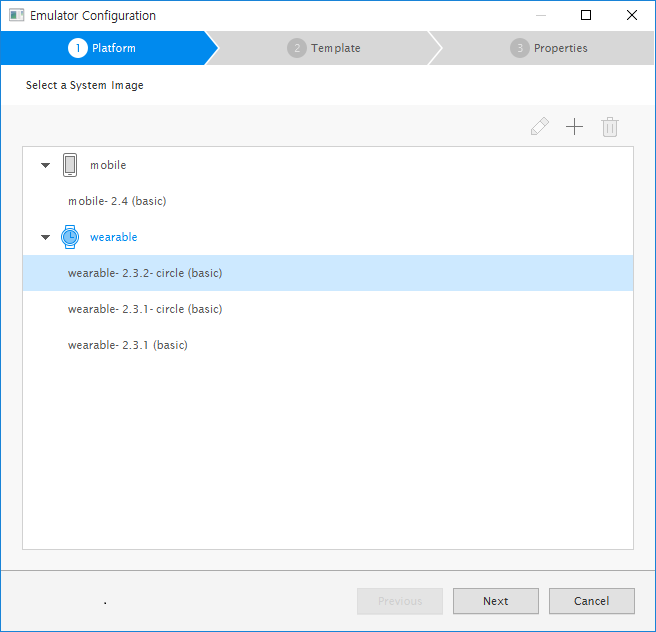
- In the Emulator Manager, click Create.
- Select the applicable platform (in this case, wearable-2.3.2-circle (basic)), and click Next.
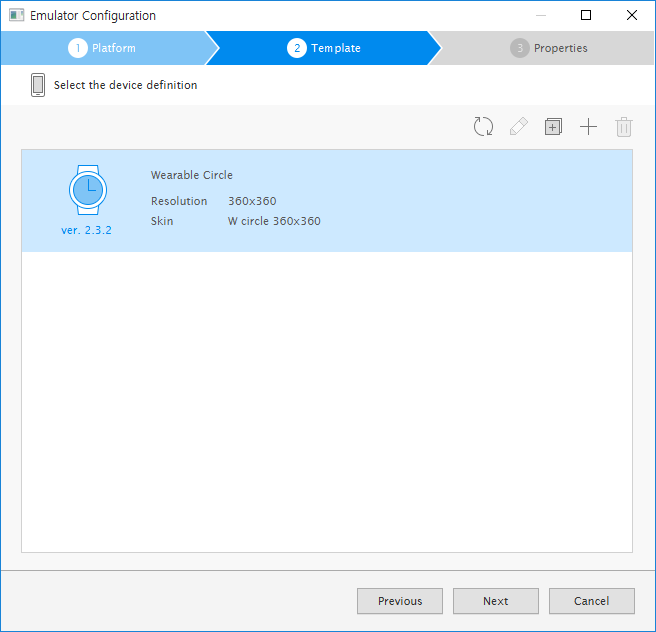
- Select the device definition along with the platform version (in this case, Wearable Circle), and click Next.
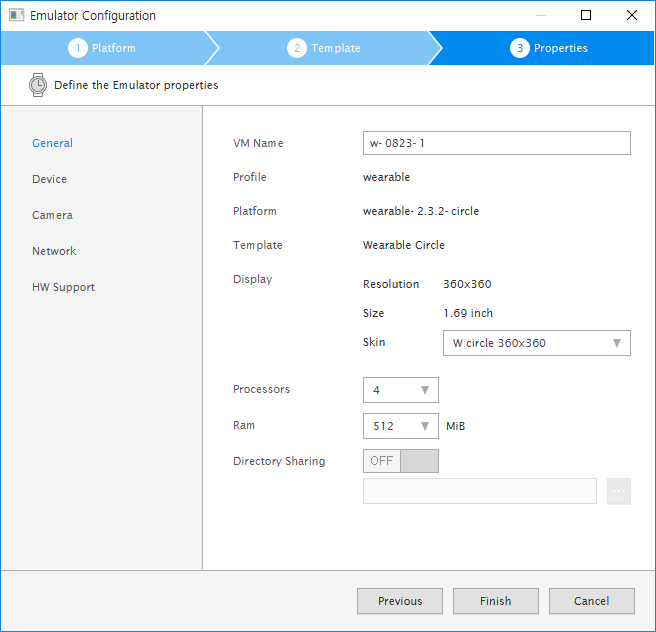
- Define the emulator properties, and click Finish.
You can leave the options to their default values.
- To launch the emulator instance, select the emulator from the list and click Launch.
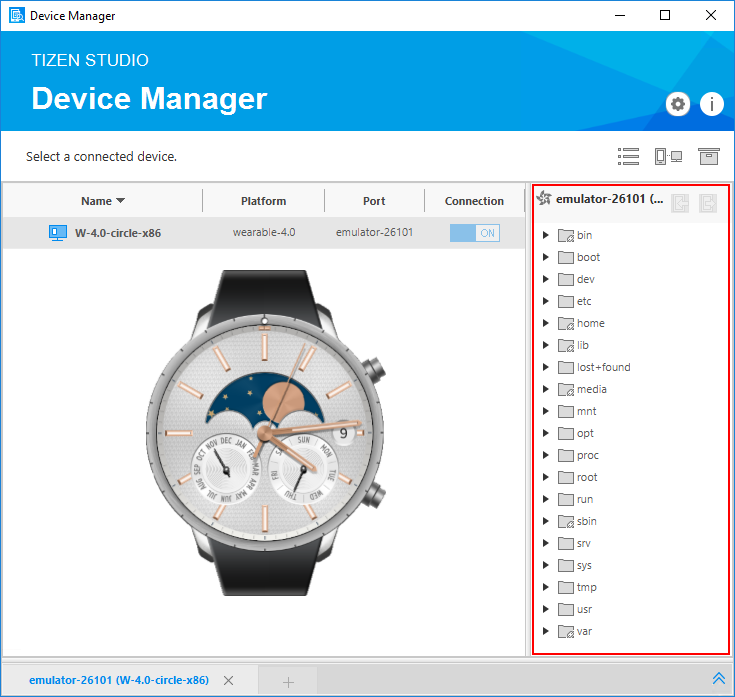
The emulator is launched in its own window. You can also see the new emulator instance in the Connection Explorer view. To view the emulator folder structure, click the arrow next to the emulator instance.
- In the Connection Explorer view, launch the Emulator Manager by clicking the related icon.
- Generate a security profile.
Before you run the application, you must sign your application package with a certificate profile in the Tizen Studio.
- Run the application:
- In the Project Explorer view, right-click the project and select Run As > Tizen Native Application.
Alternatively, you can also select the project in the Project Explorer view and do one of the following:
- Press the Ctrl+F11 key.
- Click the run icon in the toolbar.
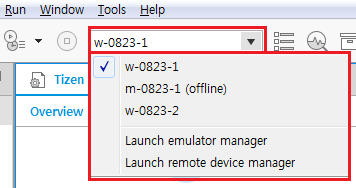
If you have created multiple emulator instances, select the instance you want from the combo box in the toolbar before selecting to run the application. If you select an offline emulator, it is automatically launched when you select to run the application.
- Confirm that the application launches on the emulator.
 NoteIf the emulator display has switched off, you cannot see the application launch. To switch the display on, click the Power key (in the right bottom corner of the emulator).
While the application is running, the Log view in the Tizen Studio shows the log, debug, and exception messages from the methods defined in the log macros. To see the view, in the Tizen Studio menu, go to Window > Show View > Log.
- In the Project Explorer view, right-click the project and select Run As > Tizen Native Application.
For more information on using the emulator features, see Using Emulator Control Keys, Menu, and Panel and Using Extended Emulator Features.
Running on a Target Device
To run the application on a target device:
- Connect the wearable target device to your computer:
- Define settings in the device:
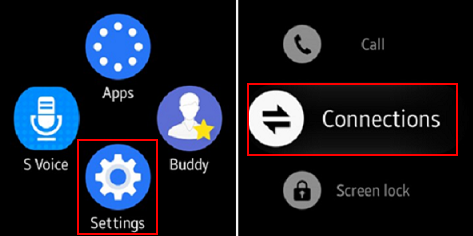
- Go to Settings > Connections, and switch on Bluetooth.
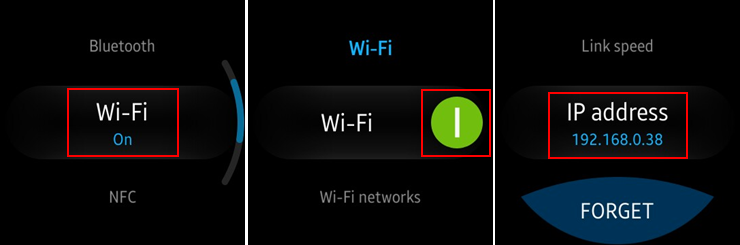
- Go to Settings > Connections, and switch on Wi-Fi.
The device and the computer must be connected to the same Wi-Fi network.
Note the IP address the device is using.
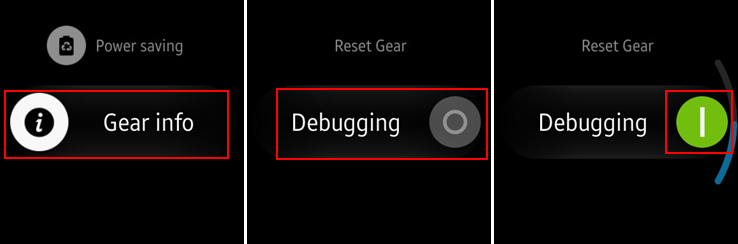
- Go to Settings > Gear info, and switch on the debugging mode.
- Go to Settings > Connections, and switch on Bluetooth.
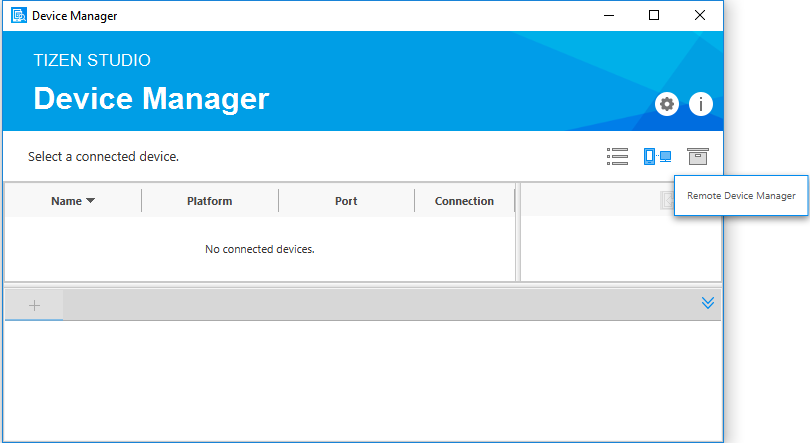
- Use the Remote Device Manager to connect the wearable device:
- In the Connection Explorer view, launch the Remote Device Manager by clicking the related icon.
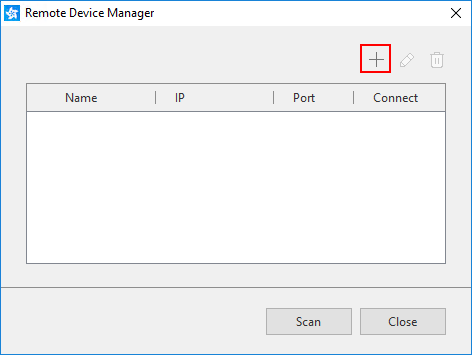
- In the Remote Device Manager window, click +.
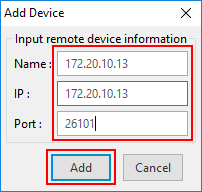
- In the Add Device window, enter the device and network details (use the IP address you noted before), and click Add.
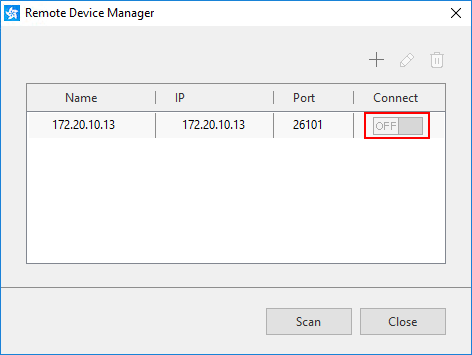
- In the Remote Device Manager window, select the new device and click Connect.
- In the Connection Explorer view, launch the Remote Device Manager by clicking the related icon.
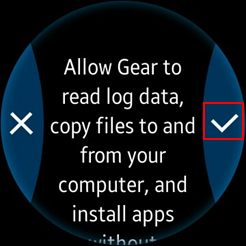
- The device asks for user confirmation. To allow Gear to read log data, copy files to and from your computer, and install the application manually, click the accept mark.
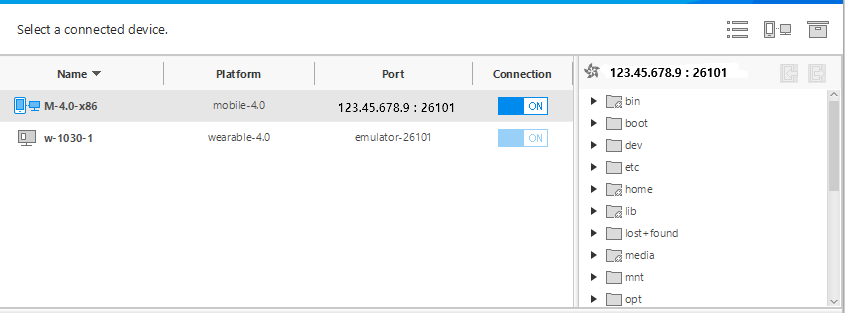
- In the Connection Explorer view, confirm that the device is connected (shown in the device list).
- Define settings in the device:
- Generate an author certificate.
Before you run the application, you must sign your application package with a certificate profile in the Tizen Studio.
- Run the application:
- In the Connection Explorer view, select the device.
- In Project Explorer view, right-click the project and select Run As > Tizen Native Application.
Alternatively, you can also select the project in the Project Explorer view and do one of the following:
- Press the Ctrl+F11 key.
- Click the run icon in the toolbar.
If you have both a connected device and existing emulator instances, select the device from the combo box in the toolbar before selecting to run the application.
-
Confirm that the application launches in the target device.
NoteThe application is launched using the default debug run configuration. To create and use another configuration:- In the
Project Explorerview, right-click the project and selectRun As > Run Configurations. - In the
Run Configurationswindow, click theNew Launch Configurationicon ( ), define the configuration details, and launch the application by clicking
 Run.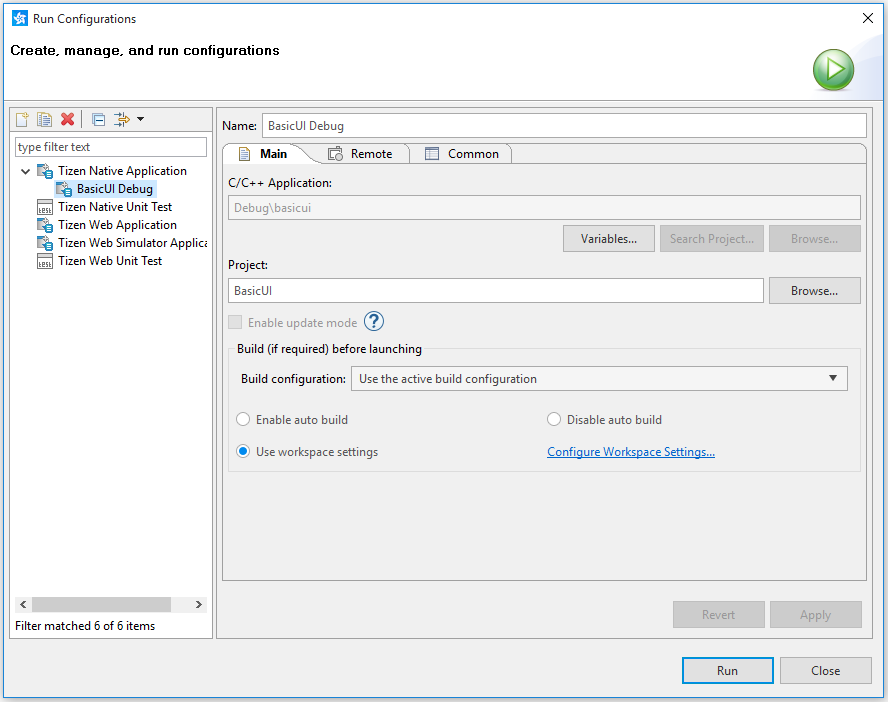
If you want to run your application without a local device, see Managing and Connecting Devices for Testing.
Building a Simple UI
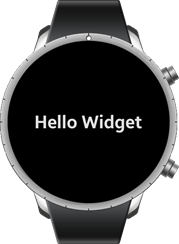
The following steps demonstrate how to create a simple user interface for a circular wearable device using EFL. The following figure shows the screen you can create with these instructions.
Figure: Wearable native UI
This guide consists of the following:
- Defining the data structure
- Registering life-cycle callbacks
- Creating UI objects
Defining the Data Structure
A pointer to important objects is stored in the following data structure:
struct appdata {
    Evas_Object *win;
    Evas_Object *conform;
    Evas_Object *label;
};
typedef struct appdata appdata_s;
Registering Life-cycle Callbacks
The
main()function has callbacks that manage specific parts of the application life-cycle:app_create- Called when the application process starts.
- Used to create UI components.
app_terminate- Called while the application process is terminating.
- Called after the main loop quits.
app_resume(UI applications only)- Called when the application window is shown.
app_pause(UI applications only)- Called when the application window is totally hidden.
app_control- Called after the
app_createcallback when the process starts or called when a launch request is received while the process is running. - Can receive
app_controldata (parameters for launching the application). - Used to implement parameter-specific actions of the application.
- Called after the
int
main(int argc, char *argv[])
{
    appdata_s ad = {0,};
    int ret = 0;
    ui_app_lifecycle_callback_s event_callback = {0,};
    app_event_handler_h handlers[5] = {NULL,};

    event_callback.create = app_create;
    event_callback.terminate = app_terminate;
    event_callback.pause = app_pause;
    event_callback.resume = app_resume;
    event_callback.app_control = app_control;

    ret = ui_app_main(argc, argv, &event_callback, &ad);
    if (ret != APP_ERROR_NONE)
        dlog_print(DLOG_ERROR, LOG_TAG, "app_main() failed. Err=%d", ret);

    return ret;
}
Creating UI Objects
The
app_create()function is called when the process starts, and it calls thecreate_base_gui()function:static bool app_create(void *data) { /* Hook to take necessary actions before the main event loop starts Initialize UI resources and application data If this function returns true, the application main loop starts If this function returns false, the application is terminated */ appdata_s *ad = data; create_base_gui(ad); return true; }In the
create_base_gui()function, you can create a simple user interface that consists of window, conformant, and label objects:static void create_base_gui(appdata_s *ad) { /* Window */ ad->win = elm_win_util_standard_add(PACKAGE, PACKAGE); elm_win_autodel_set(ad->win, EINA_TRUE); if (elm_win_wm_rotation_supported_get(ad->win)) { int rots[4] = {0, 90, 180, 270}; elm_win_wm_rotation_available_rotations_set(ad->win, (const int *)(&rots), 4); } evas_object_smart_callback_add(ad->win, "delete,request", win_delete_request_cb, NULL); eext_object_event_callback_add(ad->win, EEXT_CALLBACK_BACK, win_back_cb, ad); /* Conformant */ ad->conform = elm_conformant_add(ad->win); elm_win_indicator_mode_set(ad->win, ELM_WIN_INDICATOR_SHOW); elm_win_indicator_opacity_set(ad->win, ELM_WIN_INDICATOR_OPAQUE); evas_object_size_hint_weight_set(ad->conform, EVAS_HINT_EXPAND, EVAS_HINT_EXPAND); elm_win_resize_object_add(ad->win, ad->conform); evas_object_show(ad->conform); /* Label */ ad->label = elm_label_add(ad->conform); elm_object_text_set(ad->label, "<align=center>Hello Tizen</align>"); evas_object_size_hint_weight_set(ad->label, EVAS_HINT_EXPAND, EVAS_HINT_EXPAND); elm_object_content_set(ad->conform, ad->label); /* Show the window after the base GUI is set up */ evas_object_show(ad->win); }To break down the above code:
-
Window objects can be created by using the
elm_win_util_standard_add()function and adding callbacks on window objects. One of the callbacks handles thedelete,requestevent when the window is to be closed, and the other handles theEEXT_CALLBACK_BACKevent when the hardware back key is pressed./* Window */ ad->win = elm_win_util_standard_add(PACKAGE, PACKAGE); elm_win_autodel_set(ad->win, EINA_TRUE); if (elm_win_wm_rotation_supported_get(ad->win)) { int rots[4] = {0, 90, 180, 270}; elm_win_wm_rotation_available_rotations_set(ad->win, (const int *)(&rots), 4); } evas_object_smart_callback_add(ad->win, "delete,request", win_delete_request_cb, NULL); eext_object_event_callback_add(ad->win, EEXT_CALLBACK_BACK, win_back_cb, ad); -
You can create a conformant object that is based on the window.
The
elm_win_indicator_mode_set()function decides whether the indicator is visible, and theelm_win_indicator_opacity_set()function sets the indicator opacity mode.You can set the conformant object as a resize object of the window by using the
elm_win_resize_object_add()function. It means that the conformant size and position are controlled by the window object directly.The
evas_object_show()function makes the conformant object visible./* Conformant */ ad->conform = elm_conformant_add(ad->win); elm_win_indicator_mode_set(ad->win, ELM_WIN_INDICATOR_SHOW); elm_win_indicator_opacity_set(ad->win, ELM_WIN_INDICATOR_OPAQUE); evas_object_size_hint_weight_set(ad->conform, EVAS_HINT_EXPAND, EVAS_HINT_EXPAND); elm_win_resize_object_add(ad->win, ad->conform); evas_object_show(ad->conform);
-
You can add a label object for text by using the
elm_label_add()function. It adds a new label to the parent (conformant object).You can also set the text to the label by using the
elm_object_text_set()function./* Label */ ad->label = elm_label_add(ad->conform); elm_object_text_set(ad->label, "<align=center>Hello Tizen</align>"); evas_object_size_hint_weight_set(ad->label, EVAS_HINT_EXPAND, EVAS_HINT_EXPAND); elm_object_content_set(ad->conform, ad->label);
-
When all the UI components are ready, make the window object visible by using the
evas_object_show()function:/* Show the window after the base GUI is set up */ evas_object_show(ad->win);
Build your own Web App
This tutorial is a saved archive from http://developer.samsung.com/gear/develop/creating-your-first-app/web-widget dated 2016-12-29
Welcome to Tizen wearable Web widget application development!
A wearable Web application is basically a Web site stored on a wearable device. You can create it using Web-native languages, such as HTML5, CSS, and JavaScript.
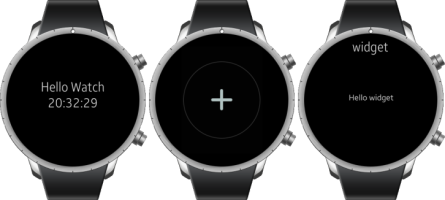
A widget application is one of the Tizen application types. It can be shown by specific UI applications (such as the home screen and lock screen) that can contain widget applications.
Figure: Widget application in a wearable device
Study the following instructions to help familiarize yourself with the Tizen Web application development process as well as using the Tizen Studio and installing the created application on the emulator or target device. With the instructions, you can create and run a basic wearable Web widget application (a Web widget), which displays some text on the screen with no user interaction:
- Before you get started with developing Tizen applications, download and install the Tizen Studio.
For more information about the installation process, see the installation guide.
- Create a wearable Web widget project using the Tizen Studio.
This step shows how you can use a predesigned project template that creates all the basic files and folders required for your project.
- Build the application.
After you have implemented code for the features you want, this step shows how you can build the application to validate and compile the code.
- Run the application.
This step shows how you can run the application on the emulator or a real target device.
- Build a UI.
This step shows how you can create the application UI.
When you are developing a more complex application, you can take advantage of the Web tools included in the Tizen Studio to ease the tasks of creating functionality and designing the application UI.
Creating a Project
The following example shows you how to create and configure a basic wearable Web widget application project in the Tizen Studio. An application project contains all the files that make up an application.
Use a standalone widget application for testing purposes. If you want to publish the application in the Tizen market place, combine it with at least 1 UI application in the same package. For more information, see Developing Multiple Projects as a Combined Package.
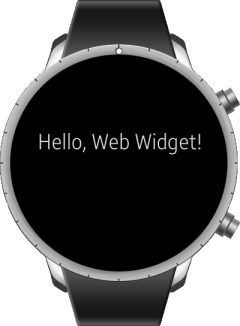
The following figure illustrates the application to be created. The application screen displays the Hello, Web Widget! text and no user interaction is provided.
Figure: Wearable Web Widget application

To create the application project:
-
Launch the Tizen Studio.
-
Make sure the Web perspective is selected in the top right corner of the Tizen Studio window.
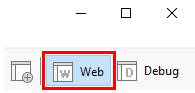
If not, select it. If the perspective is not visible, in the Tizen Studio menu, select Window > Perspective > Open Perspective > Other > Web, and click OK.
-
In the Tizen Studio menu, select File > New > Tizen Project.
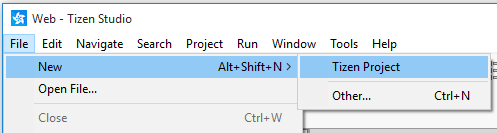
The Project Wizard opens.
-
In the Project Wizard, define the project details.
The Project Wizard is used to create the basic application skeleton with the required folder structure and mandatory files. You can easily create different applications by selecting an applicable template or sample for the Project Wizard to use.
-
Select the Template project type and click Next.
-
Select the profile (Wearable) and version from a drop-down list and click Next.
The version depends on the platform version you have installed and with which you are developing the application.
-
Select the Web Application application type and click Next.
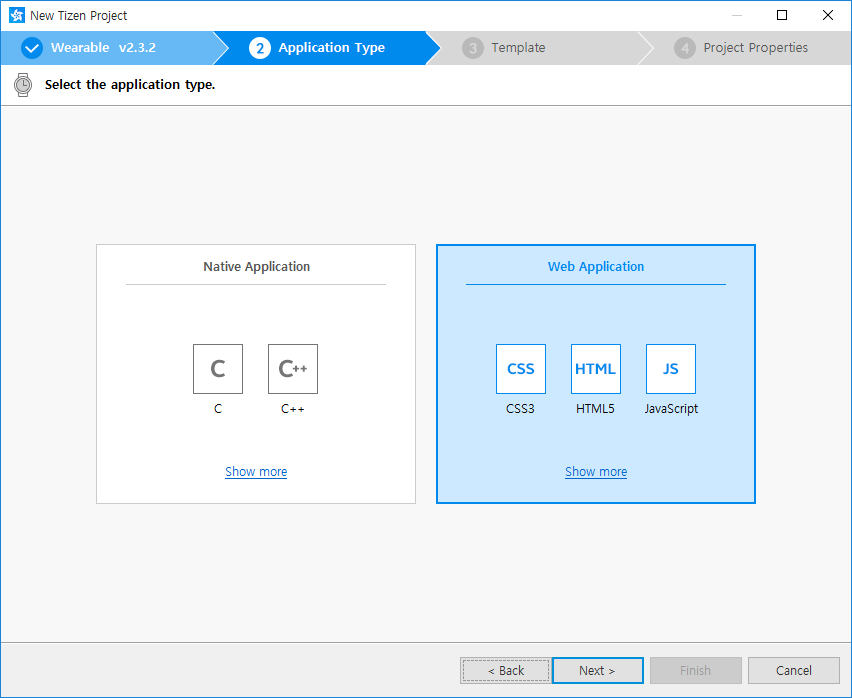
-
Select the Widget template and click Next.
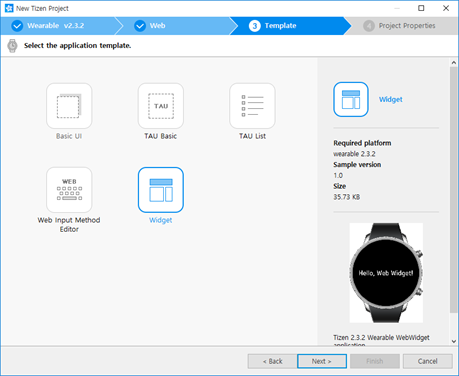
-
Define the project properties and click Finish.
You can fill the project name (3-50 characters) and the unique package ID. You can also select the location and working sets by clicking More properties.
The Project Wizard sets up the project, creates the application files using the default content from the template, and closes. For more information about the Project Wizard and the available templates, see Creating Tizen Projects with Tizen Project Wizard.
-
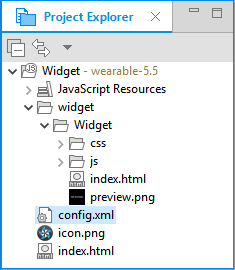
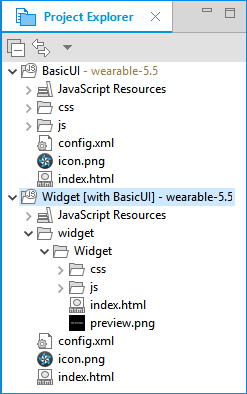
You can see the created project in the Project Explorer view. The most important files and folders include:
-
css: Folder for CSS files used by the application to style its content -
js: Folder for JavaScript files used by the application to implement its functional logic -
config.xml: Application configuration file used by the platform to install and launch the application -
icon.png: Application icon file used by the platform to represent the widget -
index.html: Main HTML file for the layout of the application screen -
preview.png: Preview of the widget application file that is displayed in the widget view on the target.
Figure: Application in the Project Explorer
Your application project is now ready for further actions. Next, build the application.
Checking the Application with the API Validator
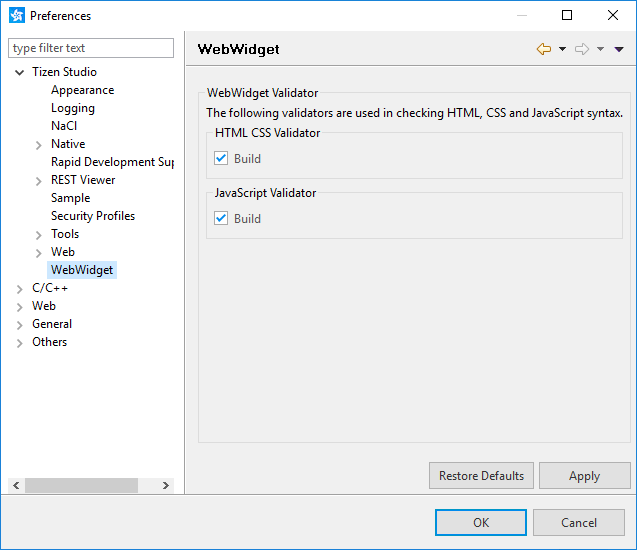
You can validate a Tizen wearable widget application using one of 3 validators:
- HTML validator
- CSS validator
- JS validator
You can enable or disable these validators in the application preferences: go to Window > Preferences > Tizen Studio > WebWidget, and check the applicable check boxes.
Figure: Validation preferences
The validation is performed automatically when the project or package is built, or when the application is run.
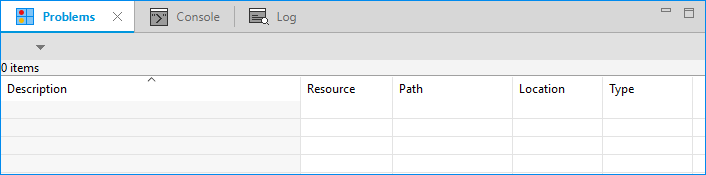
When the validation is complete, its results are shown in the Problems view. If the view is not displayed, select it from Window > Show view > Problems (keyboard shortcut: Shift + Alt + Q + X).
Figure: Validation results
Managing the Application Configuration
To view and modify the application configuration:
-
In the Project Explorer view, double-click the
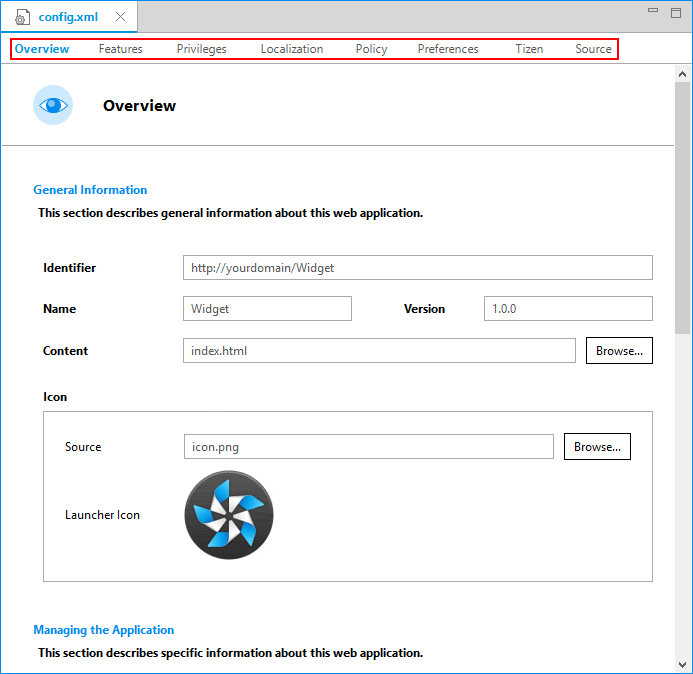
config.xmlfile of the application. The Tizen Studio opens the file in the Web application configuration editor. -
In the configuration editor, view and modify the configuration details using the various tabs:
-
Overview: Define general information, such as the name and icon of the application.
-
Features: Define required software and hardware features. This information is used for application filtering in the Tizen market place.
-
Privileges: Define the security-sensitive APIs or API groups accessed and used by the application.
-
Policy: Request network resource permissions to access external network resources.
-
Localization: Define localized values for the application name, description, and license.
-
Preferences: Define name-value pairs that can be set or retrieved through the application.
-
Tizen: Edit the Tizen schema extension properties of the application.
-
Source: View and edit the source code of the
config.xmlfile. Changes made and saved on the other tabs are reflected in the source code and vice versa.NoteTheconfig.xmlfile must conform to both the XML file format and the W3C specification requirements. Editing the file in the Source tab is intended for advanced users only.
-
-
To save any changes, in the Tizen Studio menu, select File > Save All.
For more information about configuring the application, see Setting the Web Application Configuration.
Building Your Application
After you have created the application project, you can implement the required features. In this example, only the default features from the project template are used, and no code changes are required.
When your application code is ready, you must build the application. The building process performs a validation check and compiles your JavaScript and CSS files.
You can build the application in the following ways:
-
Automatically
The automatic build means that the Tizen Studio automatically rebuilds the application whenever you change a source or resource file and save the application project.
To use the automatic build:
- Select the project in the Project Explorer view.
- In the Tizen Studio menu, select Project > Build Automatically.
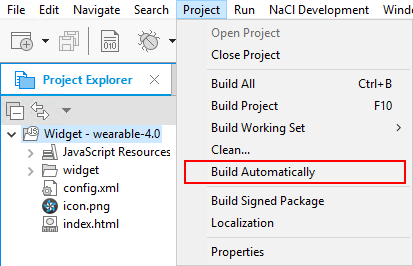
A check mark appears next to the menu option.
You can toggle the automatic build on and off by reselecting Project > Build Automatically.
-
Manually
The manual build means that you determine yourself when the application is built.
To manually build the application, right-click the project in the Project Explorer view and select Build Project.
Figure: Manually building the application

Alternatively, you can also select the project in the Project Explorer view and do one of the following:
- In the Tizen Studio menu, select Project > Build Project.
- Press the F10 key.
After you have built the application, run it.
Running Your Application
You can run the Web widget application on the emulator or a real target device.
Running on the Emulator
To run the application on the emulator:
- Create and launch an emulator instance in the Emulator Manager:
- In the Connection Explorer view, launch the Emulator Manager by clicking the related icon.
- In the Emulator Manager, click Create.
- Select the applicable platform (in this case, wearable-2.3.2-circle (basic)), and click Next.
- Select the device definition along with the platform version (in this case, Wearable Circle), and click Next.
- Define the emulator properties, and click Finish.
You can leave the options to their default values.
- To launch the emulator instance, select the emulator from the list and click Launch.
-
The emulator is launched in its own window. You can also see the new emulator instance in the Connection Explorer view. To view the emulator folder structure, click the arrow next to the emulator instance.
- In the Connection Explorer view, launch the Emulator Manager by clicking the related icon.
- Generate a security profile.
Before you run the application, you must sign your application package with a certificate profile in the Tizen Studio.
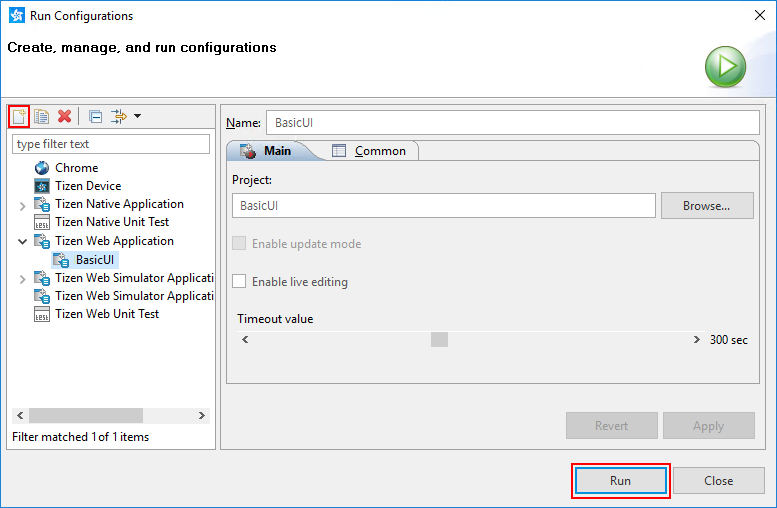
- Run the application:
- In the Project Explorer view, right-click the project and select Run As > Tizen Web Application.
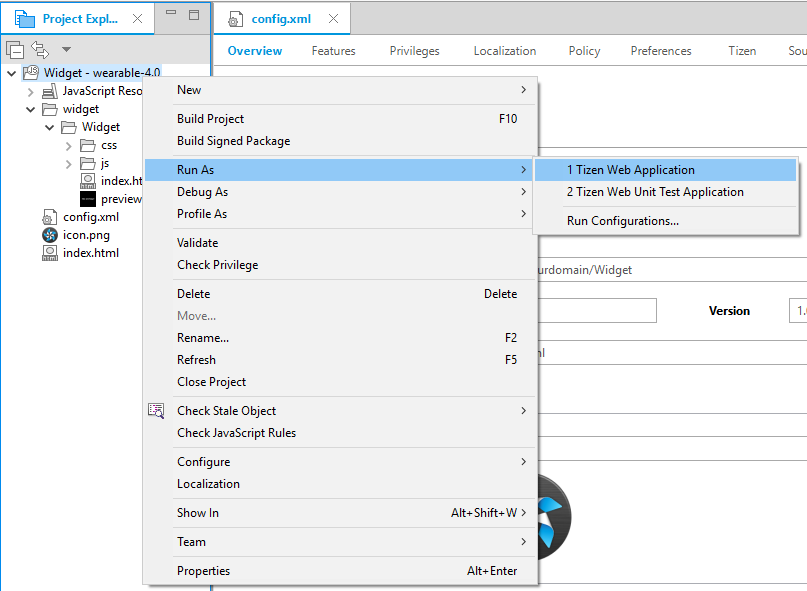
Alternatively, you can also select the project in the Project Explorer view and do one of the following:
- Press the Ctrl+F11 key.
- Click the run icon in the toolbar.
If you have created multiple emulator instances, select the instance you want from the combo box in the toolbar before selecting to run the application. If you select an offline emulator, it is automatically launched when you select to run the application.
- Confirm that the application launches on the emulator.
 NoteIf the emulator display has switched off, you cannot see the application launch. To switch the display on, click the Power key (in the right bottom corner of the emulator).
The above screen is shown through the Viewer, to allow you to develop a lone widget application for testing purposes.
To see the widget running on the home screen, add the widget there:
- Press the Back key (in the top right corner of the emulator device) to return to the home screen (showing a watch face).
- Swipe the home screen to the right and select +.
- Scroll down until you see your widget application, and select it.
You can see the added widget on the home screen. To access the widget from the home screen, swipe right.

While the application is running, the Log view in the Tizen Studio shows the log, debug, and exception messages from the methods defined in the log macros. To see the view, in the Tizen Studio menu, go to Window > Show View > Log.
- In the Project Explorer view, right-click the project and select Run As > Tizen Web Application.

For more information on using the emulator features, see Using Emulator Control Keys, Menu, and Panel and Using Extended Emulator Features.
Running on a Target Device
To run the application on a target device:
- Connect the wearable target device to your computer:
- Define settings in the device:
- Go to Settings > Connections, and switch on Bluetooth.
- Go to Settings > Connections, and switch on Wi-Fi.
The device and the computer must be connected to the same Wi-Fi network.
Note the IP address the device is using.
- Go to Settings > Gear info, and switch on the debugging mode.
- Go to Settings > Connections, and switch on Bluetooth.
-
In the terminal, enter the following commands:
cd tizen-sdk/tools
./sdb connect <IP address of Gear S2>
Use the IP address you noted before.
Instead of the terminal, you can also use the Remote Device Manager for the connection.
-
In the first attempt, the connection fails and the device asks for user confirmation. To allow Gear to read log data, copy files to and from your computer, and install the application manually, click the accept mark.
- In the Connection Explorer view, confirm that the device is connected (shown in the device list).
- Define settings in the device:
- Generate an author certificate.
Before you run the application, you must sign your application package with a certificate profile in the Tizen Studio.
- Run the application:
- In the Connection Explorer view, select the device.
- In Project Explorer view, right-click the project and select Run As > Tizen Web Application.
Alternatively, you can also select the project in the Project Explorer view and do one of the following:
- Press the Ctrl+F11 key.
- Click the run icon in the toolbar.
If you have both a connected device and existing emulator instances, select the device from the combo box in the toolbar before selecting to run the application.
- Confirm that the application launches in the target device.
Like with the emulator, you must add the widget to the home screen before you can see it.
NoteThe application is launched using the default debug run configuration. To create and use another configuration:- In the
Project Explorerview, right-click the project and selectRun As > Run Configurations. - In the
Run Configurationswindow, click theNew Launch Configurationicon (), define the configuration details, and launch the application by clicking Run.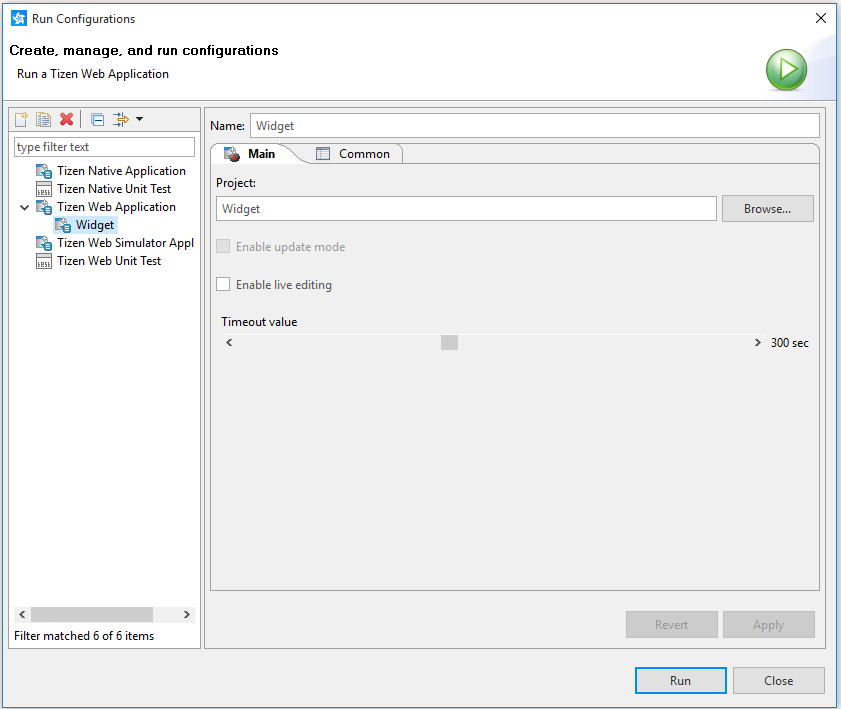
If you want to run your application without a local device, see Managing and Connecting Devices for Testing.
Building a Simple UI
The following example is based on a template project for a wearable widget application, which was introduced in Creating a Project.
The template project makes it easy to create your widget application. Without modification, you can build and run the project. However, it is important to understand the following template code to customize it.
Initializing the Widget Application
To initialize the widget application:
- Edit the widget application settings in the
config.xmlfile.The file include various information for the widget application. The following code shows an example of the widget content in the file. The
<tizen:app-widget>element indicates the widget settings. If the widget requires privileges, add them to theconfig.xmlfile as well.<?xml version="1.0" encoding="UTF-8"?> <widget xmlns:tizen="http://tizen.org/ns/widgets" xmlns="http://www.w3.org/ns/widgets" id="http://yourdomain/HelloWebWidget" version="1.0.0"> <tizen:app-widget id="0lVPHbX9t6.HelloWebWidget.HelloWebWidget" primary="true"> <tizen:widget-label>Hello Web Widget!</tizen:widget-label> <tizen:widget-content src="index.html"> <tizen:widget-size preview="preview.png">2x2</tizen:widget-size> </tizen:widget-content> </tizen:app-widget> <tizen:application id="0lVPHbX9t6.HelloWebWidget" package="0lVPHbX9t6" required_version="2.3.2"/> <content src="index.html"/> <feature name="http://tizen.org/feature/screen.size.normal"/> <name>HelloWebWidget</name> <tizen:profile name="wearable"/> </widget>
- Defining the widget as a standalone or combined (Web application + Web widget) application.
The widget application can be a standalone application, which means that it does not connect to a Web application, or it can be combined in the same package with a Web UI application. However, you cannot publish a standalone widget in the Tizen store.
When you create a widget application in the Tizen Studio, it is always first a standalone application. If you want to connect to a Web UI application, you can package the widget with a Web UI application:
- Create a Web UI application and the widget application.
- In the Project Explorer view, right-click the Web application, and select Properties > Tizen Studio > Package > Multi, and select the widget to be included in the package.
- Click OK.
In the following figure, the Widget widget application is packaged with the App UI application. The Widget widget application indicates this with the [with App] text.
Creating the Widget Application
The widget application consists of the following folder architecture:
widget
   css
      style.css
   images
   js
      main.js
   config.xml
   preview.png
   index.html
You can customize the index.html, style.css, and main.js files. For example, if a JS-based animation effect is needed, add the requestAnimationFrame() method or some other animation library to the JS file. Similarly, to change the UI elements' visual looks or add CSS-based effects (including animation), modify the CSS file.
To create the widget application:
- Start and initialize the widget application with the
index.htmlfile.The starting point is defined in the
config.xmlfile'scontent srcfield, which is set toindex.html. - The
index.htmlfile includes the element structure of the widget application using HTML elements. In addition, it imports the JavaScript and CSS files.<!DOCTYPE html> <html> <head> <meta charset="UTF-8"> <link rel="stylesheet" type="text/css" href="css/style.css"> <script src="js/main.js"></script> </head> <body> <div id="page"> <div id="container"> <span id="content-text">Hello, Web Widget!</span> </div> </div> </body> </html>
- The
style.cssfile indicates the style properties of various HTML elements.The
index.htmlfile imports thestyle.cssfile.html, body { width: 100%; height: 100%; margin: 0; padding: 0; } #page { background-color: #000; color: #fff; height: 100%; position: relative; width: 100%; } #container { left: 50%; position: absolute; top: 50%; transform: translate(-50%, -50%); } #content-text { font-weight: bold; font-size: 40px; } - The
main.jsfile contains the JS-based functions for the widget.There are many JS-based functions, such as asynchronous functions, JS library, and effects. You can add various features to the widget application using JS.