Difference between revisions of "Minibot Arm"
| Line 5: | Line 5: | ||
The first thing that you will need to do is print the thumb2 file and the Archer claw or Minibot claw to depending on weather you are building the Minibot robot or archer controller. | The first thing that you will need to do is print the thumb2 file and the Archer claw or Minibot claw to depending on weather you are building the Minibot robot or archer controller. | ||
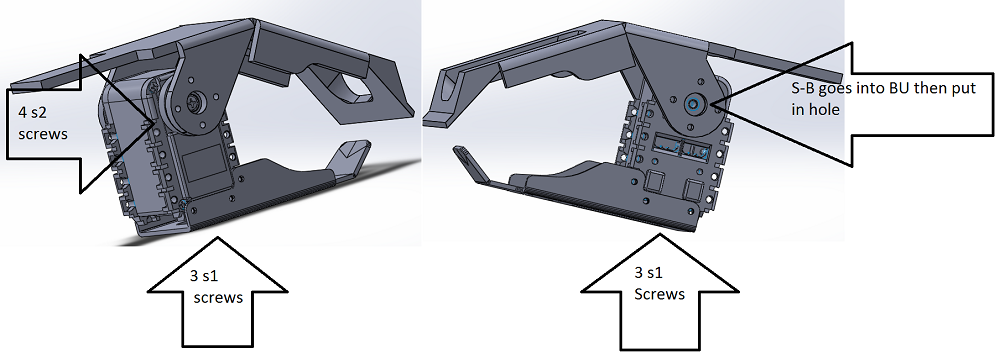
| + | * as shown in the figure there are 4 S2 screws, 6 S1 screws, one S-B screw, one BU and there needs to be 6 N1 nuts for connecting the thumb2 file to the servo | ||
[[File:Minibotclaw.png]] | [[File:Minibotclaw.png]] | ||
| + | |||
| + | the next part is the forearm | ||
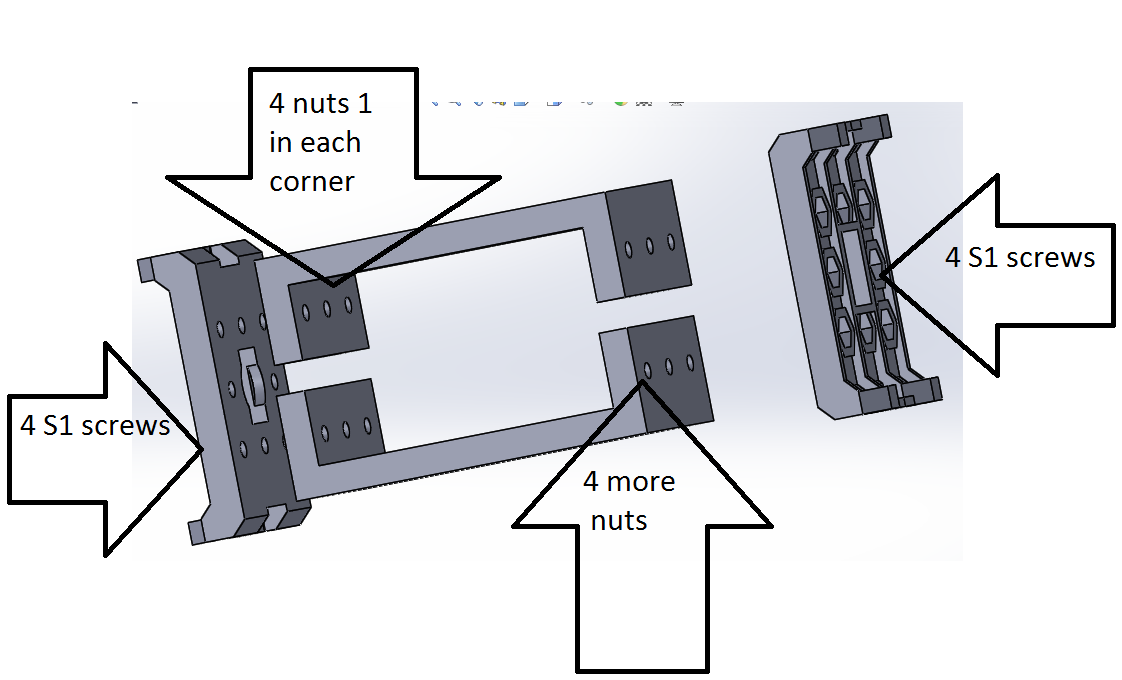
| + | * this part needs 8 S1 screws and 8 N1 nuts. | ||
| + | |||
| + | [[File:Forarm.png]] | ||
| + | |||
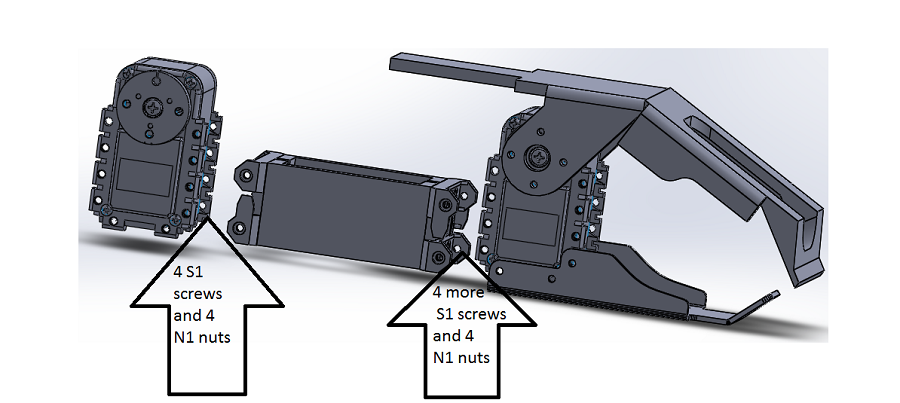
| + | connecting the forearm to the servos is simple you use 8 total S1 screws and 8 N1 nuts. The nuts are inserted into the servo and the screws are connected from there. | ||
| + | |||
| + | [[File:Building1.png]] | ||
Revision as of 22:26, 2 December 2014
This is part two of building MiniBot and Archer there is some additional explanation in the Head Build
The claw in this part you should have down loaded the cad files for the link. In the link there is a file called minibot. In that file there is a minibot build file that has the whole build of minibot. all you will need to do is save it as an stl which is explained in the Head Build and print the parts.
The first thing that you will need to do is print the thumb2 file and the Archer claw or Minibot claw to depending on weather you are building the Minibot robot or archer controller.
- as shown in the figure there are 4 S2 screws, 6 S1 screws, one S-B screw, one BU and there needs to be 6 N1 nuts for connecting the thumb2 file to the servo
the next part is the forearm
- this part needs 8 S1 screws and 8 N1 nuts.
connecting the forearm to the servos is simple you use 8 total S1 screws and 8 N1 nuts. The nuts are inserted into the servo and the screws are connected from there.


