Difference between revisions of "ECE-370: Full H-Bridge"
From Lofaro Lab Wiki
(Created page with "Due: 2019-02-19 Using 4x of the FETs provided in the kit make a full H-Bridge for one of the motors. Note the image below shows the location of the <b><u>G</u></b>ait, <b><u...") |
|||
| Line 3: | Line 3: | ||
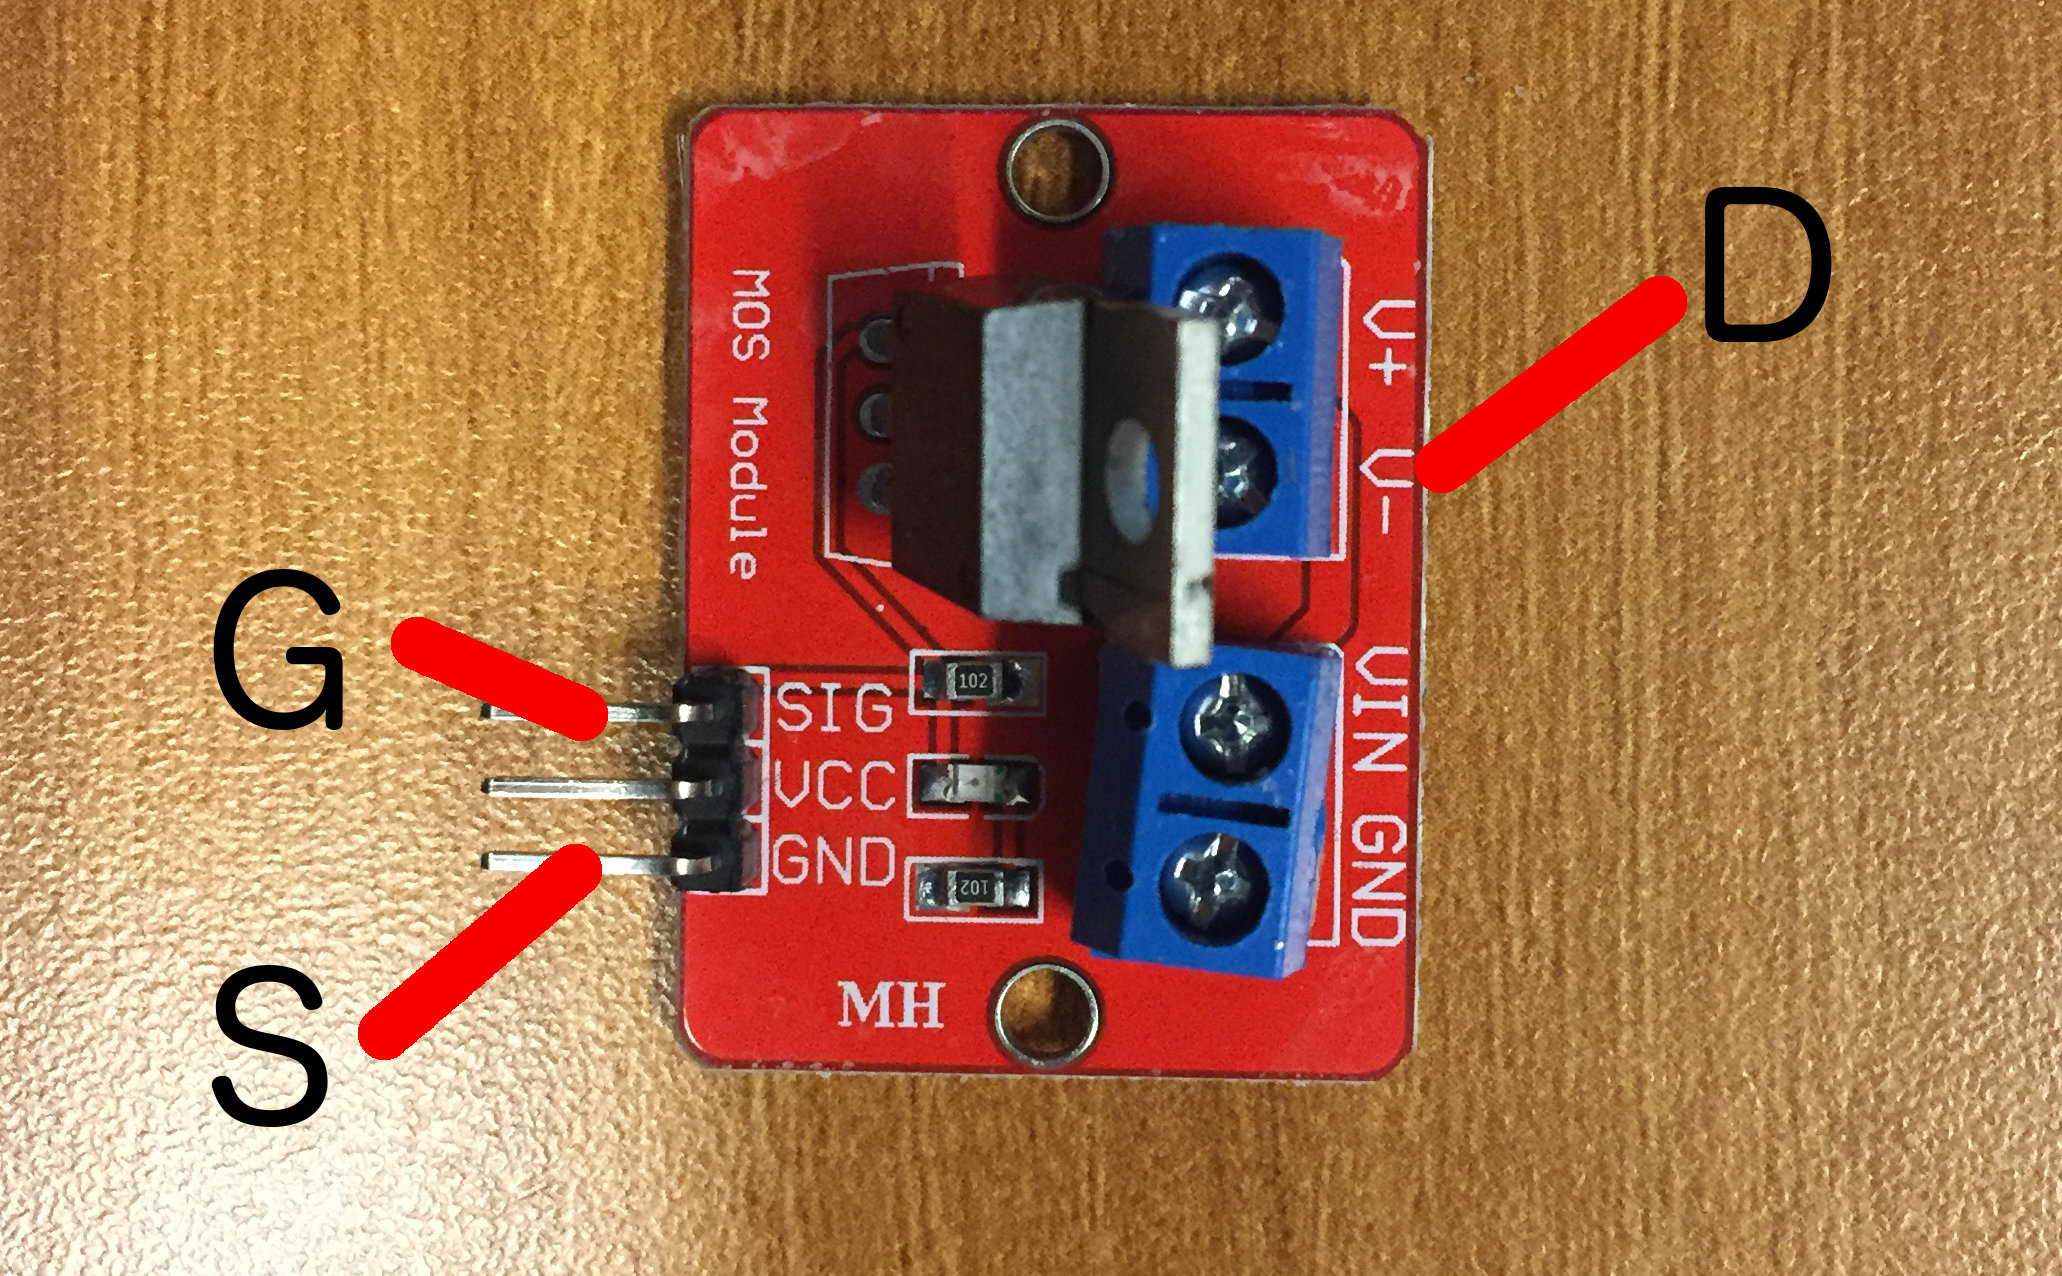
Using 4x of the FETs provided in the kit make a full H-Bridge for one of the motors. Note the image below shows the location of the <b><u>G</u></b>ait, <b><u>S</u></b>ource, and <b><u>D</u></b>rain | Using 4x of the FETs provided in the kit make a full H-Bridge for one of the motors. Note the image below shows the location of the <b><u>G</u></b>ait, <b><u>S</u></b>ource, and <b><u>D</u></b>rain | ||
| − | [File:FET.jpg] | + | [[File:FET.jpg]] |
Todo: | Todo: | ||
Revision as of 22:03, 10 February 2019
Due: 2019-02-19
Using 4x of the FETs provided in the kit make a full H-Bridge for one of the motors. Note the image below shows the location of the Gait, Source, and Drain
Todo:
- Make a program to run the following PWM duty cycles: 25%, 50%, and 75% in both directions. (you may use pwm() or analogOutput())
- Make a video of the motor running at each of the above duty cycles (provide youtube link).
- Determine the PWM Frequency, ensure it is above 500hz.
- Show image of oscilloscope showing the different PWM duty cycles and PWM frequency.
- Provide a SHORT wright up of what you did
- Show a picture of your test setup
- Provide a schematic of your test setup
- Include your Psudo Code example of what you did
- Include a copy of your source code (in a separate file)
