Difference between revisions of "Creating Kinect mount in SketchUp and preparing for 3D printing"
| Line 25: | Line 25: | ||
[[File:Kinect mount SketchUp.png]] | [[File:Kinect mount SketchUp.png]] | ||
| − | The 3D model needs to be converted into an STL(STereoLithography) file format to be 3D printed. The STL file describes the simple geometric structure of to-be-printed objects to the 3D printer. The 3D model must be a closed solid component for it to be convertible to STL format. In SketchUp, a 3D model consists of several surfaces that are shapes and lines by themselves, so make sure that there are no gaps/holes between surfaces. Select everything that makes up the model, go to '''Edit'''>'''Make Component''', name the component in the new dial up box and click '''Create''' to turn the selection into a component. | + | |
| + | The 3D model needs to be converted into an STL(STereoLithography) file format to be 3D printed. The STL file describes the simple geometric structure of to-be-printed objects to the 3D printer. The 3D model must be a closed solid component for it to be convertible to STL format. In SketchUp, a 3D model consists of several surfaces that are shapes and lines by themselves, so make sure that there are no gaps/holes between surfaces. Select everything that makes up the model, go to '''Edit'''>'''Make Component''', name the component in the new dial up box and click '''Create''' to turn the selection into a component. | ||
| + | |||
| + | [[File:Make a component.png]] | ||
Revision as of 01:51, 3 February 2015
Step 1: Choose a 3D CAD software - SketchUp ![]()
Use a 3D CAD software such as SketchUp or Autocad 360 to design a model of the Kinect mount. SketchUp software has a simple user interface and making 3D objects is also simple and straight-forward.
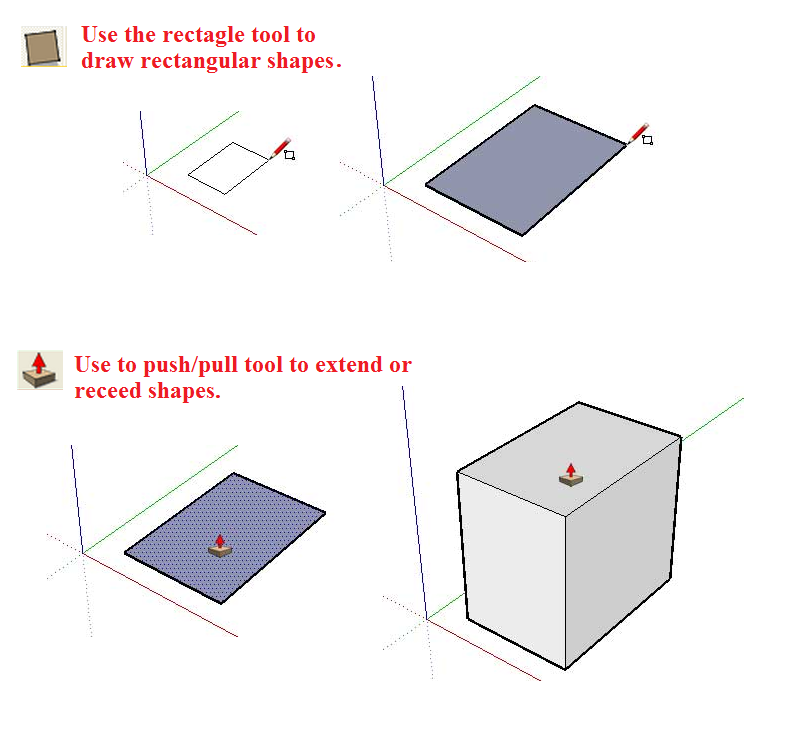
The basic shape tools required to create 3D models in SketchUp are illustrated in the picture below.
Step 2: Create the 3D model using the basic tools.
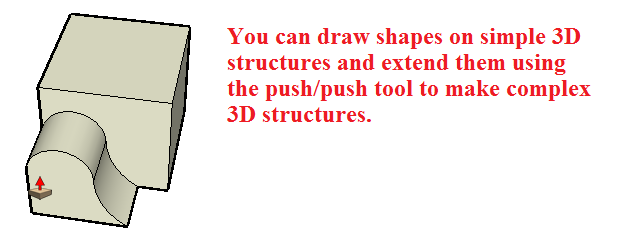
Complex structures can be made in multiple steps by using the basic tools. Follow the simple tutorial below on how to create an interesting 3D structure.
Now, let's add an interesting shape to the model by using a combination of shapes and push/push tools. 
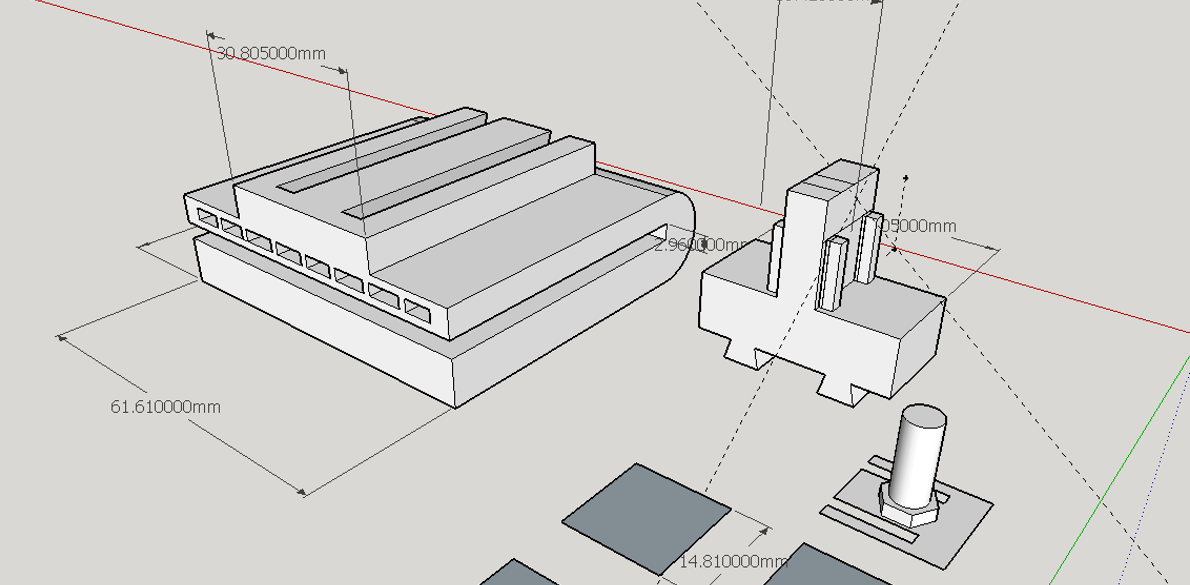
You may want to visit http://www.sketchup.com/learn for detailed tutorials on how to make 3D models in SketchUp. After exploiting the power of combining the functions of the basic tools, our design in SketchUp looks like the following (in mm scale).
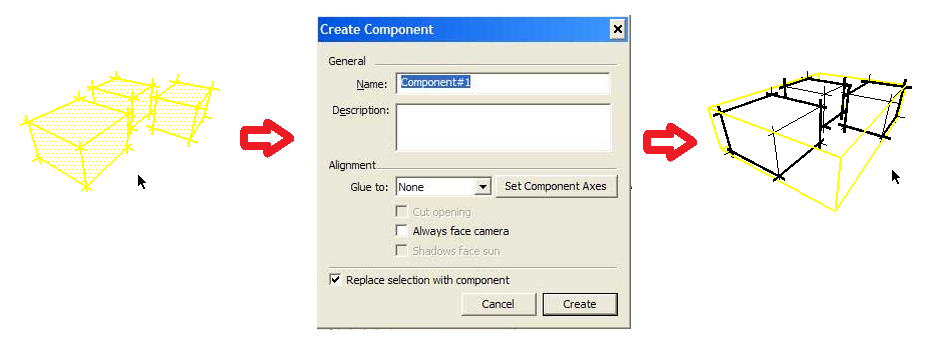
The 3D model needs to be converted into an STL(STereoLithography) file format to be 3D printed. The STL file describes the simple geometric structure of to-be-printed objects to the 3D printer. The 3D model must be a closed solid component for it to be convertible to STL format. In SketchUp, a 3D model consists of several surfaces that are shapes and lines by themselves, so make sure that there are no gaps/holes between surfaces. Select everything that makes up the model, go to Edit>Make Component, name the component in the new dial up box and click Create to turn the selection into a component.


