Make your own robot- Make URDF
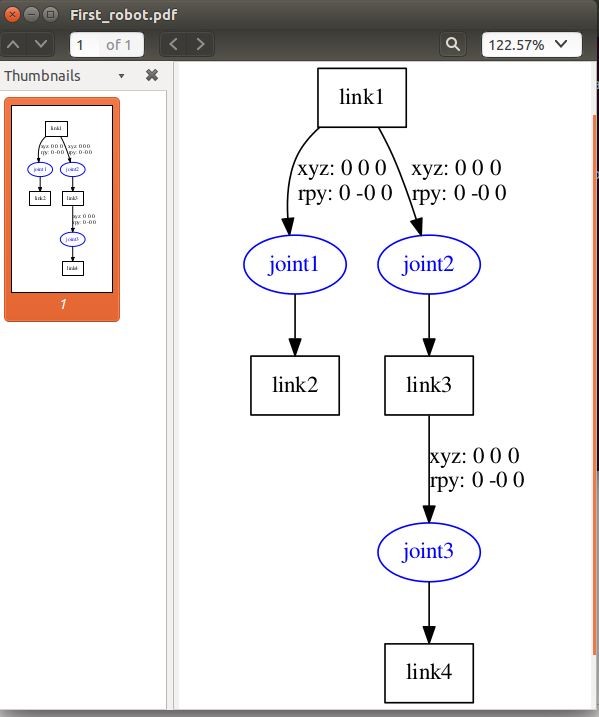
In this tutorial we will learn how to create an urdf file within a package and how to use this. First we need to make the tree structure which will determine how many links and joints you want to be in your robot. We need to make a description of tree structure. It might be looking like this
 <robot name="test_robot">
  <link name="link1" />
  <link name="link2" />
  <link name="link3" />
  <link name="link4" />

  <joint name="joint1" type="continuous">
    <parent link="link1"/>
    <child link="link2"/>
  </joint>

  <joint name="joint2" type="continuous">
    <parent link="link1"/>
    <child link="link3"/>
  </joint>

  <joint name="joint3" type="continuous">
    <parent link="link3"/>
    <child link="link4"/>
  </joint>
</robot>
Write this with any of your text editor and save the file giving a urdf extension. For example if you want to give your robot name first_robot, your urdf file name should be first_robot.urdf. After creating the urdf file you need to parse it. Make sure your file is within a package which is in a ros workspace otherwise you will fail to parse the file. Say your workspace is mywork which is in the directory of /home/user/mywork, if your package is myrobot it should reside within the workspace directory. Make a folder named urdf within the package directory and put your urdf file in the directory. Now after putting urdf file in the location, go to the terminal and be in your ros workspace run the command
Check_urdf my_robot.urdf
This will parse the urdf file within the package and make it ready for future design. You can test the file using the command
$ evince test_robot.pdf
This will generate a pdf file and show you the status of your robot.
